

Image sliders are a popular way to showcase multiple images or content in a visually appealing manner on websites. In this tutorial, we’ll walk you through the process of creating an image slider using ReactJS and the react-slick library along with slick-carousel, along with the slick-carousel package. This dynamic combination will allow you to create a smooth and interactive image slider for your web projects.
Setting up the project
Begin by creating a new React application using Create React App or your preferred method.
npx create-react-app image-slider-demo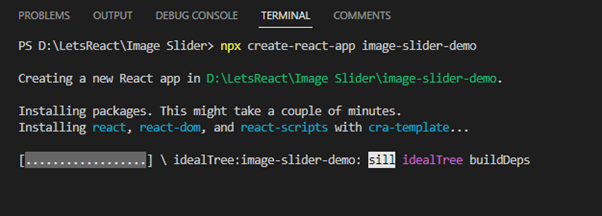
Navigate to the directory using the command:
cd image-slider-demoInstalling Dependencies
In your project directory, install the react-slick and slick-carousel packages:
npm install react-slick slick-carouselComponent Setup
Open the src folder and create a new component called ImageSlider.js. This component will house the image slider functionality.
// src/ImageSlider.js
import React from "react";
import Slider from "react-slick";
import "slick-carousel/slick/slick.css";
import "slick-carousel/slick/slick-theme.css";
import "./ImageSlider.css"; // Create this file for custom styles

const ImageSlider = ({ images }) => {
  const settings = {
    dots: true,
    infinite: true,
    speed: 500,
    slidesToShow: 1,
    slidesToScroll: 1,
    autoplay: true,
    autoplaySpeed: 2000,
    cssEase: "linear",
  };

  return (
    <div className="image-slider">
      <Slider {...settings}>
        {images.map((image, index) => (
          <div key={index}>
            <img src={image} alt={`Slide ${index}`} />
          </div>
        ))}
      </Slider>
    </div>
  );
};

export default ImageSlider;
Add Styling
Create a CSS file named ImageSlider.css in the same directory as ImageSlider.js. Customize your slider’s appearance here.
/* src/ImageSlider.scss */
.image-slider {
  width: 80%;
  margin: auto;
  text-align: center;
}
.image-slider .slick-dots {
  bottom: -30px;
}
.image-slider img {
  max-width: 100%;
  height: auto;
  margin: auto;
}
Using the Image Slider
In your src/App.js or any other desired component, import and use the ImageSlider component.
// src/App.js
import "./App.css";
import ImageSlider from "./ImageSlider";
import flowerImg from "./images/flower.jpg";
import lighthouseImg from "./images/lighthouse.jpg";
import dandelion from "./images/dandelion.jpg";

function App() {
  const images = [
    lighthouseImg,
    flowerImg,
    dandelion,
    lighthouseImg,
    flowerImg,
    dandelion,
    lighthouseImg,
    // Add more image URLs here
  ];

  return (
    <div className="App">
      <div style={{padding: "10px"}}>
        <ImageSlider images={images} />
      </div>
    </div>
  );
}

export default App;

Customization in the component
The react-slick library provides a plethora of customization options to make your image slider match your website’s design and functionality. You can modify settings such as the number of slides shown, animation speed, autoplay behavior, navigation arrows, and more. The settings object in the ImageSlider component allows you to adjust these settings according to your preferences.
For instance, to add navigation arrows to your slider, simply modify the settings object:
const settings = {
  dots: true,
  infinite: true,
  speed: 500,
  slidesToShow: 1,
  slidesToScroll: 1,
  autoplay: true,
  autoplaySpeed: 3000,
  prevArrow: <div className="slick-prev">Previous</div>,
  nextArrow: <div className="slick-next">Next</div>,
};
Handling Dynamic Content
In real-world scenarios, you might need to fetch images from an API or a dynamic source. You can easily integrate asynchronous data fetching into your image slider. For instance, using the axios library to fetch images from an API:
import React, { useState, useEffect } from 'react';
import axios from 'axios';
import Slider from 'react-slick';
// ...

const DynamicImageSlider = () => {
  const [images, setImages] = useState([]);

  useEffect(() => {
    axios.get('https://your-api-endpoint.com/images')
      .then(response => {
        setImages(response.data);
      })
      .catch(error => {
        console.error(error);
      });
  }, []);

  // ...

  return (
    <div className="image-slider">
      <Slider {...settings}>
        {images.map((image, index) => (
          <div key={index}>
            <img src={image.url} alt={`Slide ${index}`} />
          </div>
        ))}
      </Slider>
    </div>
  );
};
This is a sample code if you have an API that returns the images, you can replace the URL of your API instead of “https://your-api-endpoint.com/images” in your code and make the relative changes as per the response from the API.
Accessibility Considerations
When creating an image slider, it’s crucial to consider accessibility for users who rely on assistive technologies. Adding proper alt text to each image ensures that screen readers can convey the content to visually impaired users. Additionally, you can implement keyboard navigation and focus management to make your slider usable for everyone.
Conclusion
In this article, we explored the process of creating an image slider using ReactJS and the react-slick library. We covered setting up the component, customizing its appearance and behavior, handling dynamic content, addressing responsiveness, and considering accessibility. By following these steps, you’ve gained the skills to incorporate a versatile and engaging image slider into your React applications, enhancing the visual appeal and user experience of your websites. Feel free to experiment further and adapt the slider to your specific project requirements.
![]()


