When we work on any projects that we have built and tested, the final step will be to deploy the application. We need to host and deploy our react application so that it can be made public. In this example, we will host the react application on the IIS server so that we can visit our application using the URL that we provide and it can be shared if the same network has been used.
Creating a react application
We will create an application hello-world using create-react-app. To create our application, open the directory in which you want to create your application in VS code. You can also use the terminal to create your application. The syntax for the command is as given below:
Syntax:
npx create-react-application project-nameHere the “project-name” would be the variable that indicates the name of the project that we want to use. Let’s create a project named hello-world with CRA. You can copy the command given below:
npx create-react-application hello-worldA directory named “hello-world” will be created with all the dependencies installed. Once the command runs successfully you will see the messages as shown in the image below. This indicates that the directory of your project with all the necessary files has been created.

Now you would be able to find a new directory inside the folder in which we ran the command for creating the application. The name of the directory will be the project name that we provided in the npx command.
For navigating to the project directory use the command:
cd .\hello-worldThe project created has the file structure as shown in the below image:

Let’s explore the App.js file so that we can add the changes and check if our changes reflect or not. App component is divided into basically 3 sections, first is the imports section that includes all the imports required for the component, second is the function body component that has the logic for the function and the JSX that the component would return and the last section would be the default export section.

Let’s make some minor changes so that we can see our changes in the browser as we save the component file. By saving the file you would be able to see the changes that we have added as the URL would reload automatically.
Let’s make some minor changes so that we can see our changes in the browser as we save the component file. By saving the file you would be able to see the changes that we have added as the URL would reload automatically.
App.js
import logo from './logo.svg';
import './App.css';

function App() {
return (
<div className="App">
  <header className="App-header" >
    <img src={logo} className="App-logo" alt="logo" />
    <p>
      Edit src/App.js and save to reload.
    </p>
    <a
      className="App-link"
      href="https://reactjs.org"
      target="_blank"
      rel="noopener noreferrer"
    >
      Learn React
    </a>
  </header>
</div>
);
}
export default App;
To run the command to run the project locally.
npm startRunning this command would launch the browser and visit the URL http://localhost:3000/ to run the project in development mode.
The default page of every react project is shown below. The page that we are seeing currently is the JSX returned by the App.js component. To make some changes open the App.js component.

When we run this application on localhost, the output will be as shown in the image below. We are able to see our changes as we have added the line “Welcome to Let’s React”.

This is the output when we run our app locally, but now we want to build the application and host it on the IIS server.
Building react application
The size of the development code wouldn’t be feasible to deploy due to its size, it would take a lot of time to render on the client side. To deploy the application, we would require the code to be minified to reduce the download times on the client’s browser.
The command to generate the production build directory is
npm run buildAs this command runs successfully, you will be able to see a build folder in the project directory. Now you can deploy the contents of the build folder to any web server. the build command transpiles our source code into code that the browser can understand. It uses Babel for this and files are optimized for the best performance. The build is minified and the filenames include the hashes.
As the command runs successfully, it gives the details about the size of files after optimization.

The structure of the build folder includes various folders that include the styles, js files, and the assets required to use our project.

Now our application is ready to be deployed.
Setting up IIS Server
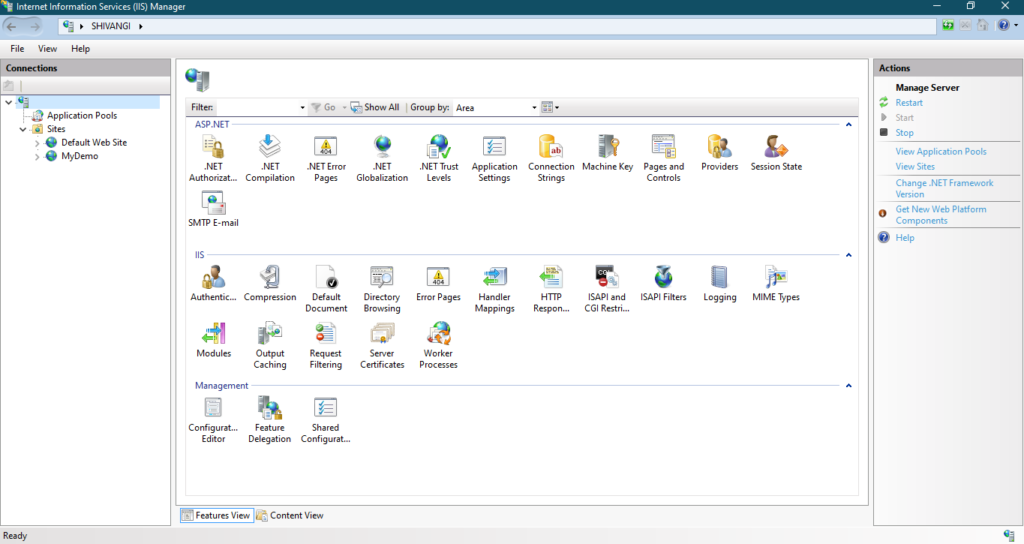
Search for IIS in your system. Open Internet Information Services manager. An application will launch with the image shown below as the home screen.

We will create a new Application Pool. For creating the Application pool right-click on Application Pools and click on “Add Application Pool”.

Enter the Name of the Application pool that you want to add and then click on the “OK” button. This will add an application pool.

Our next step will be to add the site and to add the site right click on sites from the option in the left-hand navigation menu. The sites include the list of sites that we have hosted on the IIS server.

To add a site, right-click on “Sites” and then click on “Add Website”.

Clicking on “Add website” a modal popup will open, where we need to provide some details such as the Site Name, the path of the site folder, port, etc. Here will provide the Site name as “ReactHelloWorld”, the path of the project will be the path of the build folder in the project directory and we will provide “8000” as the port. After providing the details click on the “OK” button.

Now our site will be added to the list of sites hosted on the IIS server. Click on the site that we created.

The menu on the right-hand side has the link to browse the site that we have added. Clicking on that link opens the site in the default browser.

As we want to deploy the build of our react application, we will directly point to the build directory of our project. This will help us as when we make changes to our application and build it the path will remain the same and we don’t need to copy our build package to the directory that we have pointed to.


Now if you make any changes in the code and want to publish that code, then just run the command to build the application. Once the build is successful you will be able to successfully see the changes.
Summary
In this article, we learned about building any React application and deploying our React application on the IIS server. We Learned about adding application pools in the IIS server and also adding sites to our server.
Some articles to learn more about React
What Is React?
How to install React.js with create-react-app?
Why use React?
Fundamentals of Routing
How to Improve React Performance with Lazy Loading?
Next.js: The Powerhouse Framework for React Projects
![]()


good article
Nice Article