

React Bootstrap is a powerful library that brings together the flexibility of React and the styling capabilities of Bootstrap to create interactive and visually appealing web applications. One of the essential components in the React Bootstrap library is the Tooltip component. Tooltips are small, helpful hints that appear when a user hovers over an element. In this article, we will dive into the React Bootstrap Tooltip component, exploring its features, usage, and customization options.
What is a Tooltip?
A tooltip is a UI element that provides additional information about an element when a user hovers their cursor over it. Tooltips are widely used in web applications to enhance user experience by offering context or explanations for various UI elements.
Why Use React Bootstrap Tooltip?
React Bootstrap Tooltip simplifies the process of creating and customizing tooltips in your React applications. It leverages the power of Bootstrap’s CSS and JavaScript, making it easy to add tooltips to your components without the need for extensive custom styling or scripting.
Implementing React Bootstrap Tooltip
Create a React App
Open your terminal or command prompt and navigate to the directory where you want to create your React project. Then, run the following command to create a new React application named “react-bootstrap-concepts”:
npx create-react-app react-bootstrap-concepts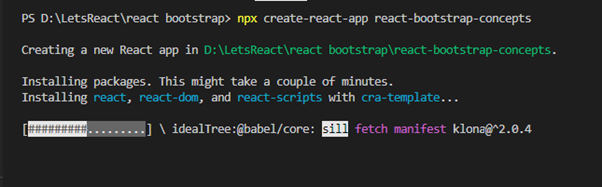
This command will set up a new React project with all the necessary files and dependencies.
Navigate to Your Project Directory
After the project is created, navigate to your project directory using the cd command:
cd react-bootstrap-conceptsInstall React Bootstrap
Before we dive into the details, ensure that you have a React application set up and the React Bootstrap library installed. You can install React Bootstrap using npm or yarn:
npm install react-bootstrap bootstrapImport Necessary Components
To use the Tooltip component, you’ll need to import it along with the elements you want to attach tooltips to:
import { OverlayTrigger, Tooltip } from 'react-bootstrap';Create the Tooltip Element
Next, define your tooltip content using the ButtonTooltip component:
const ButtonTooltip = ({ id, children, title }) => (
    <OverlayTrigger overlay={<Tooltip id={id}>{title}</Tooltip>}>
      <Button>{children}</Button>
    </OverlayTrigger>
  );
Wrap the element you want to attach the tooltip to within the OverlayTrigger component, and pass your tooltip as a prop. In this example, the tooltip will appear when the user hovers over the ButtonTooltip component.
Create a TooltipExample Component
Create a new component to demonstrate React Bootstrap concepts. You can create a file named TooltipExample.js in the src directory and add your component code there. For example:
// src/ TooltipExample.js
import React from "react";
import { OverlayTrigger, Tooltip } from "react-bootstrap";
import Button from "react-bootstrap/Button";

const TooltipExample = () => {
  const ButtonTooltip = ({ id, children, title }) => (
    <OverlayTrigger overlay={<Tooltip id={id}>{title}</Tooltip>}>
      <Button>{children}</Button>
    </OverlayTrigger>
  );

  return (
    <div>
      <h1>React Bootstrap Tooltip Example</h1>
      <ButtonTooltip title="Default title" id="t-1">
        Lorem Ipsum
      </ButtonTooltip>{" "}
      is simply dummy text of the printing and typesetting industry. Lorem Ipsum
      has been the{" "}
      <ButtonTooltip title="industry's standard tooltip" id="t-2">
        industry standard{" "}
      </ButtonTooltip>{" "}
      dummy text ever since the 1500s, when an unknown printer took a galley of
      type and scrambled it to make a type specimen book. It has{" "}
      <ButtonTooltip title="Add any text for survided button" id="t-3">
        survived
      </ButtonTooltip>{" "}
      not only five centuries , but also the leap into electronic typesetting,
      remaining essentially unchanged. It was{" "}
      <ButtonTooltip title="You can add any text here" id="t-4">
        popularised in the 1960s
      </ButtonTooltip>{" "}
      with the release of Letraset sheets containing Lorem Ipsum passages, and
      more recently with desktop publishing software like Aldus PageMaker
      including versions of{" "}
      <ButtonTooltip title="Last tooltip" id="t-5">
        Lorem Ipsum.
      </ButtonTooltip>
    </div>
  );
};

export default TooltipExample;
The output of the code would look as shown in the image below:
Use the TooltipExample Component
To display your TooltipExample component, you’ll need to import and use it in the src/App.js file (or any other entry point in your project):
import logo from "./logo.svg";
import "./App.css";
import TooltipExample from "./TooltipExample";

function App() {
  return (
    <div className="App">
      <TooltipExample />
    </div>
  );
}

export default App;
Start the Development Server
You can now start the development server by running the following command:
npm startnpm start
This command will start the development server and open your React application in your default web browser.
View Your React Bootstrap Demo
Open your web browser, and you should see your “React Bootstrap Concepts Demo” application running at http://localhost:3000/ (or another port if 3000 is in use).
Props for React Bootstrap Tooltip Component
Here are some of the props that you can use with the react-bootstrap-tooltip-component:
- title: This prop is used to set the text that will be displayed in the tooltip.
- placement: This prop is used to set the position of the tooltip. The possible values are “top”, “right”, “bottom”, and “left”.
- trigger: This prop is used to set the trigger event for the tooltip. The possible values are “hover”, “focus”, and “click”.
- delay: This prop is used to set the delay before the tooltip is displayed.
- html: This prop is used to set the HTML content of the tooltip.
- arrow: This prop is used to control the visibility of the tooltip arrow.
Customizing Tooltips
React Bootstrap Tooltip offers various customization options, including:
- Placement: You can specify where the tooltip should appear in relation to the target element (top, bottom, left, or right).
- Trigger: You can define the event that triggers the tooltip, such as ‘hover’, ‘click’, or ‘focus’.
- Custom Styling: Apply custom styles to your tooltips by adding CSS classes.
Conclusion
In this article, we explored the React Bootstrap Tooltip component and learned how to implement and customize tooltips in React applications. Tooltips are valuable for providing users with additional context and enhancing the overall user experience. By leveraging React Bootstrap, you can easily create and customize tooltips in your projects, saving time and effort in development.
![]()


