

In modern web development, creating visually appealing user interfaces is crucial. One effective way to enhance the aesthetics of your React.js application is by adding a background image. This article will guide you through the steps to seamlessly incorporate a background image into your React components.
Choose an Image
Before you start implementing a background image, you need to select a suitable image that fits the design and theme of your application. Consider the following factors when choosing an image:
- Relevance: The image should be relevant to the content and purpose of the component or page.
- Quality: Choose a high-resolution image that doesn’t appear pixelated or distorted.
- Size: Optimize the image size to ensure it doesn’t slow down the loading speed of your application.
Import the Image
Once you’ve chosen the image, you’ll need to import it into your React component. Follow these steps:
- Place the selected image in the src directory of your React project. You can create a specific directory for your images if needed.
- In the component file where you want to add the background image, import the image using the import statement. Make sure to provide the correct path to the image. For example:
import backgroundImage from './path/to/your/image.jpg';In our example, we have the image in our src/images folder so we will have the path as
import backgroundImage from "./images/add-image.jpg";Apply the Background Image
You have two main options for applying the background image: using inline styling or applying a CSS class.
Inline Styling
In this approach, you’ll directly set the styles using the style attribute of the JSX element. Here’s how you can do it:
const App= () => {
return (
<div
style={{
backgroundImage: `url(${backgroundImage})`,
backgroundSize: "cover",
backgroundRepeat: "no-repeat",
backgroundPosition: "center center",
/* Additional styles if required*/
}}
>
<div
class="textbox"
style={{
margin: "30px",
backgroundColor: "#ffffff",
border: "1px solid black",
opacity: 0.6,
/* Additional styles if required*/
}}
>
.
.
.
</div>
</div>
);
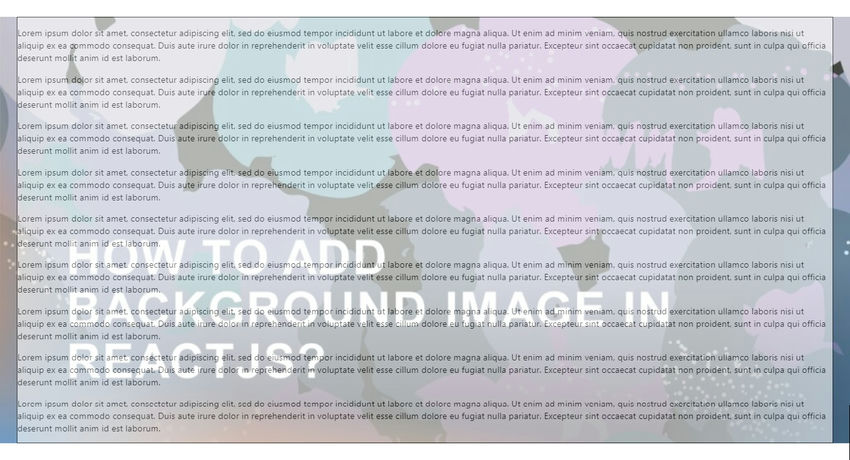
};We will have the output as shown below with dummy content over the image.
CSS Classes
This approach involves defining a CSS class for the background image and applying that class to your component.
- Create a CSS file (e.g., styles.css) in the same directory as your component.
- Define a CSS class with the background image and any additional styling you want.
/* styles.css */
div.background-image-container {
  background-image: url("./images/add-image.jpg");
  background-size: cover;
  background-repeat: no-repeat;
  background-position: center center;
}

div.textbox {
  margin: 30px;
  background-color: #ffffff;
  border: 1px solid black;
  opacity: 0.6;
}
Import the CSS file into your component
import './styles.css';Apply the CSS class to your component
const App= () => {
  return (
    <div className="background-image-container">
      <div
 className="textbox"
         {/* Your component's content */}
      </div>
    </div>
  );
};
Here our output will be the same as the one we had when using inline CSS.

Clone the GitHub Repo for running the demonstration locally in your system and play around with the code:
Conclusion
Adding a background image to a React.js component can significantly enhance the visual appeal of your application. By following the detailed steps provided in this guide, you can easily integrate background images into your components. Whether you choose to use inline styling or CSS classes, remember to consider image relevance and quality for the best user experience. Customizing your application’s appearance through background images is just one way to create engaging and visually appealing interfaces.
![]()


