ReactJS is a popular JavaScript library for building user interfaces, and it provides a powerful way to manage the state of your application. One common task in web development is changing the state of a component in response to user interactions, such as clicking a button. In this article, we will explore how to change states with an onClick event in ReactJS using functional components.
Prerequisites
Before we dive into the code, make sure you have the following prerequisites:
- Basic knowledge of JavaScript and ReactJS.
- A code editor (e.g., Visual Studio Code).
- Node.js and npm are installed on your system.
Setting Up Your React Project
If you don’t have a React project set up, you can create one using the following steps:
Open your terminal and navigate to the directory where you want to create your project.
Run the following command to create a new React application using Create React App:
npx create-react-app state-change-exampleOnce the setup is complete, navigate to your project directory:
cd state-change-exampleCreating a Functional Component
Now that you have your React project ready, let’s create a functional component that will change its state when a button is clicked.
Open the src/App.js file in your code editor.
Remove the default code inside the App component and create a new functional component called StateChanger:
import React, { useState } from "react";
import Button from "react-bootstrap/Button";

function StateChanger() {
  const [count, setCount] = useState(0);

  const handleButtonClick = () => {
    setCount(count + 1);
  };

  return (
    <div className="stateChangeDiv">
      <h1>State Change Example</h1>
      <p>Count: {count}</p>
      <Button onClick={handleButtonClick}>Increment</Button>
      <Button onClick={() => setCount(0)}>Reset</Button>
    </div>
  );
}

export default StateChanger;
In this code, we have created a functional component StateChanger that uses the useState hook to manage the count state. We also have a handleButtonClick function that increases the count when the button is clicked.
Using the Functional Component
To use the StateChanger component in your application, you need to render it in the src/App.js file.
import React from 'react';
import './App.css';
import StateChanger from './StateChanger';

function App() {
  return (
    <div className="App">
      <StateChanger />
    </div>
  );
}

export default App;
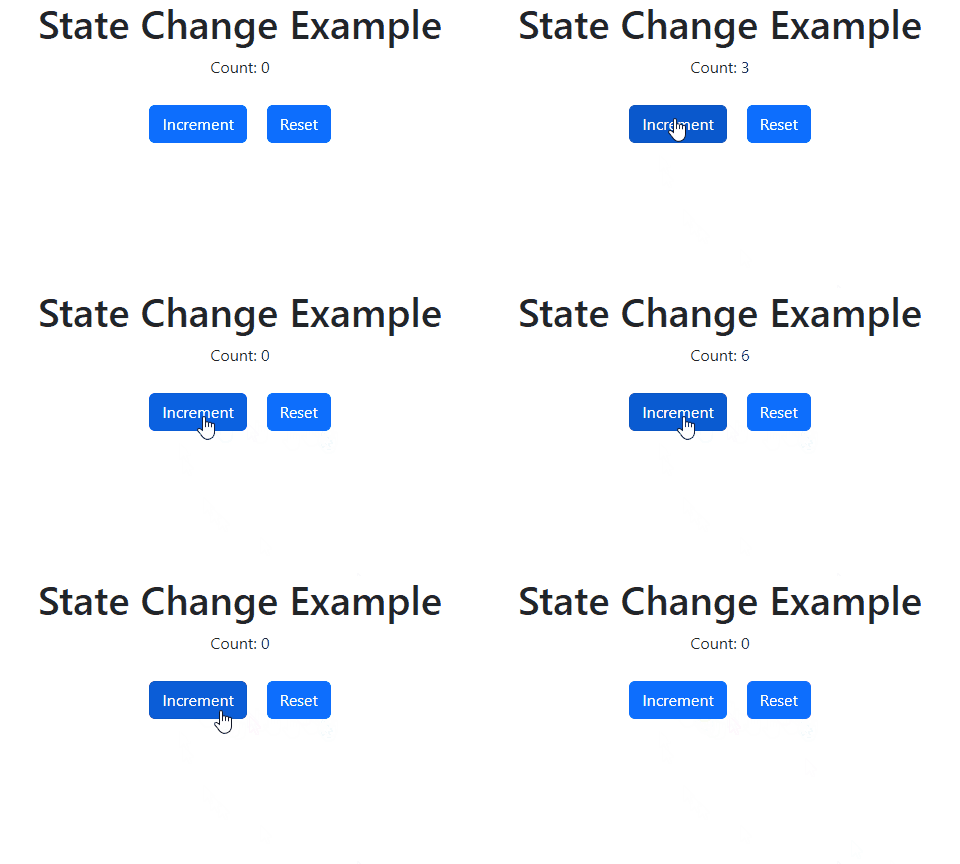
Now, when you run your React application using npm start, you’ll see the “State Change Example” with a count and a button. Clicking the button will increment the count, demonstrating how to change states with an onClick event in ReactJS using functional components.
The output of state as it changes on click of button would look as shown below:

Conclusion
In this article, we’ve explored how to change states with an onClick event in ReactJS using functional components. React’s built-in useState hook makes it easy to manage and update component states, enabling you to create dynamic and interactive user interfaces. By following the steps outlined here, you can implement state changes in your React applications effortlessly, making your web applications more responsive and user-friendly. Happy coding!
![]()


